How to Continue Pixel Set Up
Tracking who comes to your website and the actions they take is one of the most useful metrics you can have in your marketing arsenal. What's the point of running a marketing campaign if you don't know who's interacting with it? Enter the Facebook Pixel (now called Meta Pixel).
This useful little tool in your Facebook Ad account allows you to track who visits your website and what they are doing there. You can then tailor your advertising based on their actions. Want to know how to create a Facebook pixel and use it like a pro? You're in the right place. Follow this step-by-step guide to get your pixel set up in no time!
Prefer a video? 👇
Let's start with a simple question...
What's the Facebook Pixel?
You may have heard the term floating around but aren't sure what it refers to. Well, the Facebook Pixel is a bit of javascript code from Facebook. This code allows Facebook to know who has interacted with your site.
You can use your Facebook Pixel to track your Facebook advertising. It helps you to measure the success of your ads and will show you if the people you are targeting are completing the actions you want them to.
What might those actions be? Subscribing to your newsletter, submitting an email address, following you on social media, or making a purchase.
How to Create a Facebook Pixel
You will find the code to implement your pixel in your Facebook Business Suite
- Click on All tools

2. Click on Events Manager
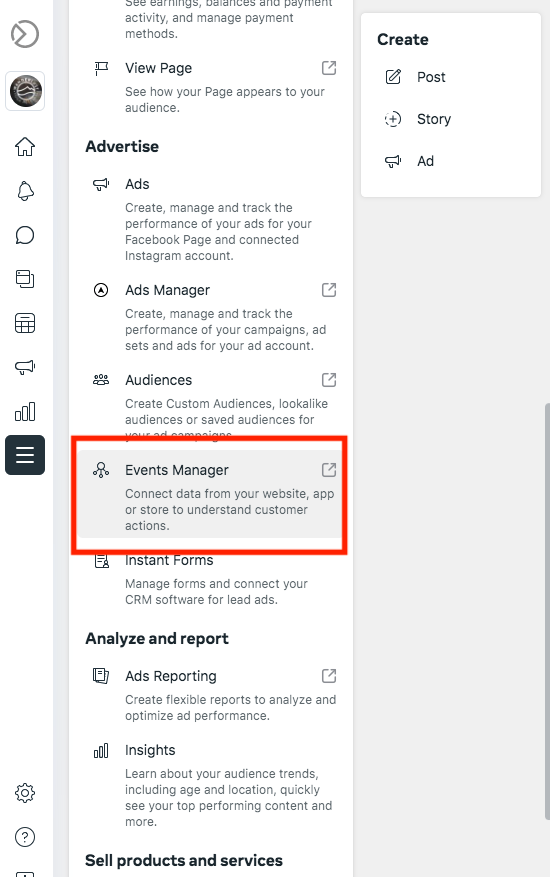
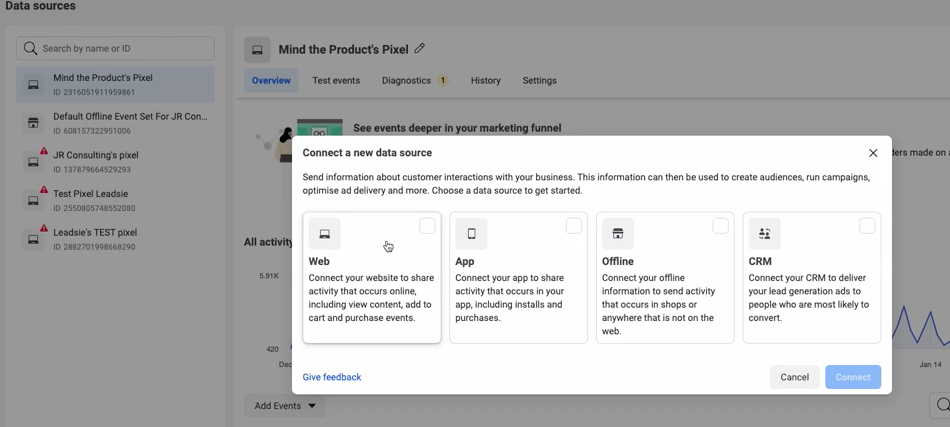
3. Click on Connect Data Sources

4. Then select Web Source —> Facebook Pixel
5. Give your Pixel a name and enter the website you want to put that pixel
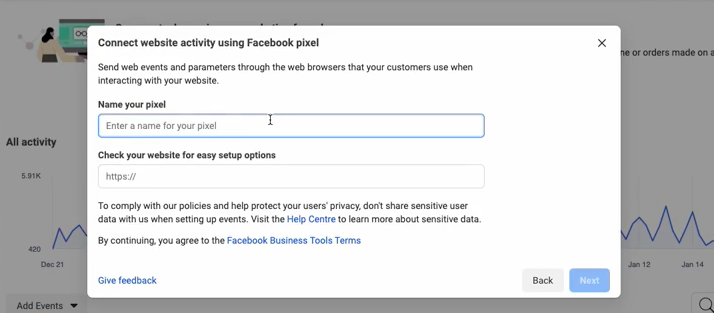
6. Your Pixel is now created! 🥳
Check below to learn how to install the Pixel.
How to Install the Pixel on your Website
How you install the pixel on your website depends a bit on the platform you use to host your site, for example, WordPress, Wix, or Squarespace.
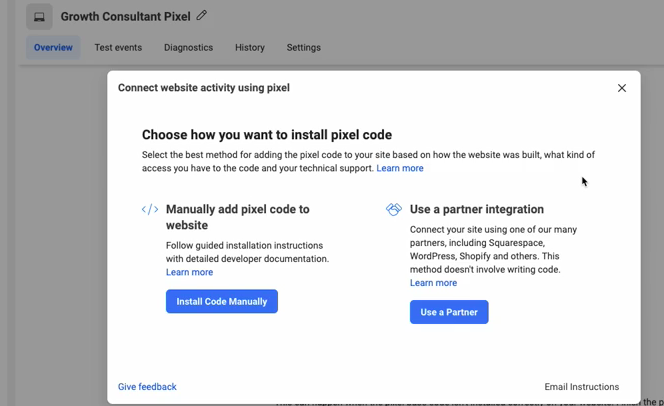
You can choose if you want to use one of Facebook's partner integrations or if you want to manually install a Pixel
To MANUALLY install the Pixel follow these steps:
- Click Install Code Manually
- Copy the code under Copy base code & paste it to your website

- The next step depends on your website host. We've giving you the detailed guide for Wordpress and Wix below!
How to Install your Facebook Pixel on WordPress
Here's how to do install your Pixel manually with WordPress:
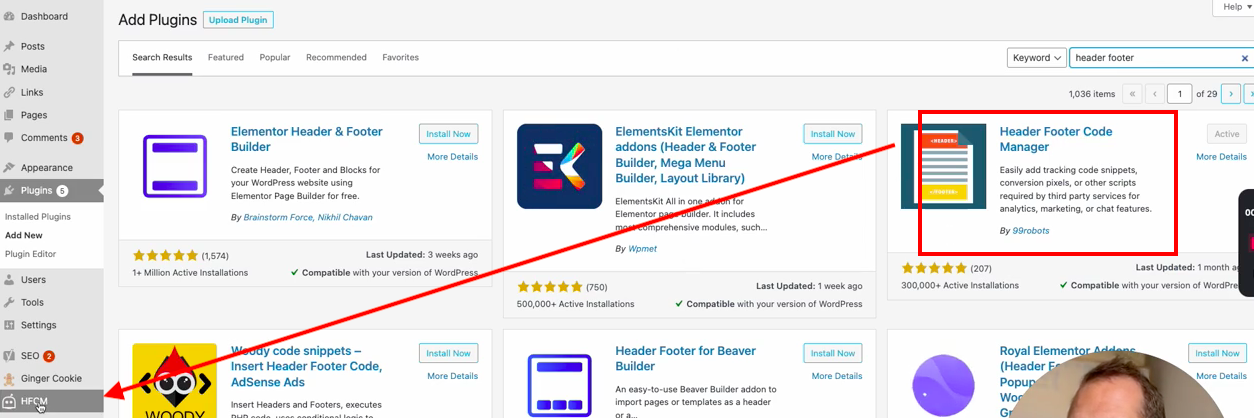
- Download the plugin Header Footer Code Manager (HFCM)
- Click on HFCM
- Add snippet
- Give the snippet a name
- Snippet type is HTML
- Select Site Wide
- Paste the code you copied from Facebook in the Snippet / Code section at the bottom
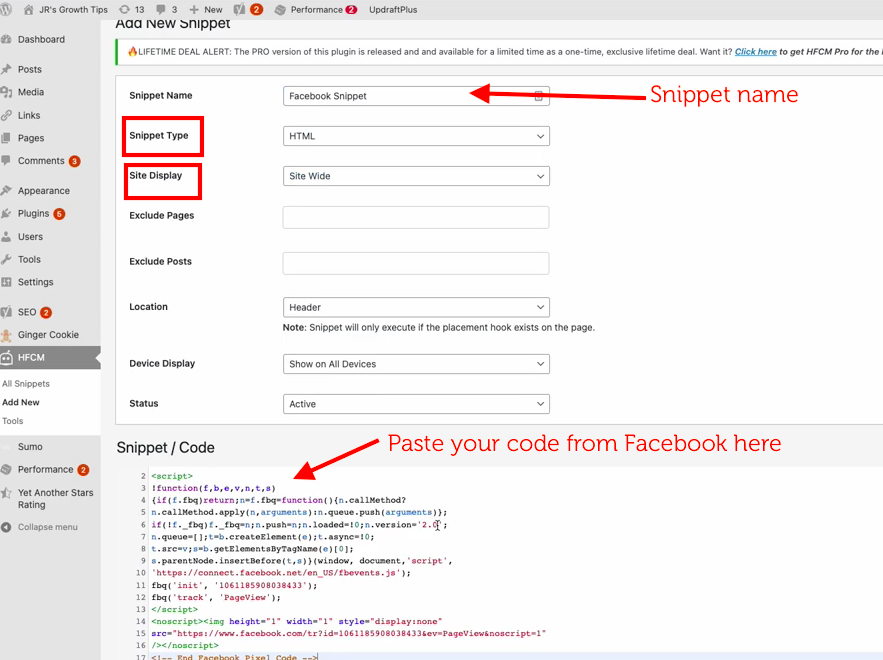
- Hit save. It's done! 🙌
How to Install your Facebook Pixel on Wix
- Login to Wix
- Choose the website you'd like to add the GTM tracking code to, then Edit Site
- Click Settings
- Then click Tracking & Analytics
- Select Facebook Pixel
- Paste your Facebook Pixel Code into the provided space
Here's how to do create AND install your Pixel with the Facebook Integration directly from Wix (no need to login in to Facebook first).
- Open up your Wix dashboard (get here by clicking WIX in the top left-hand corner of the website editor)
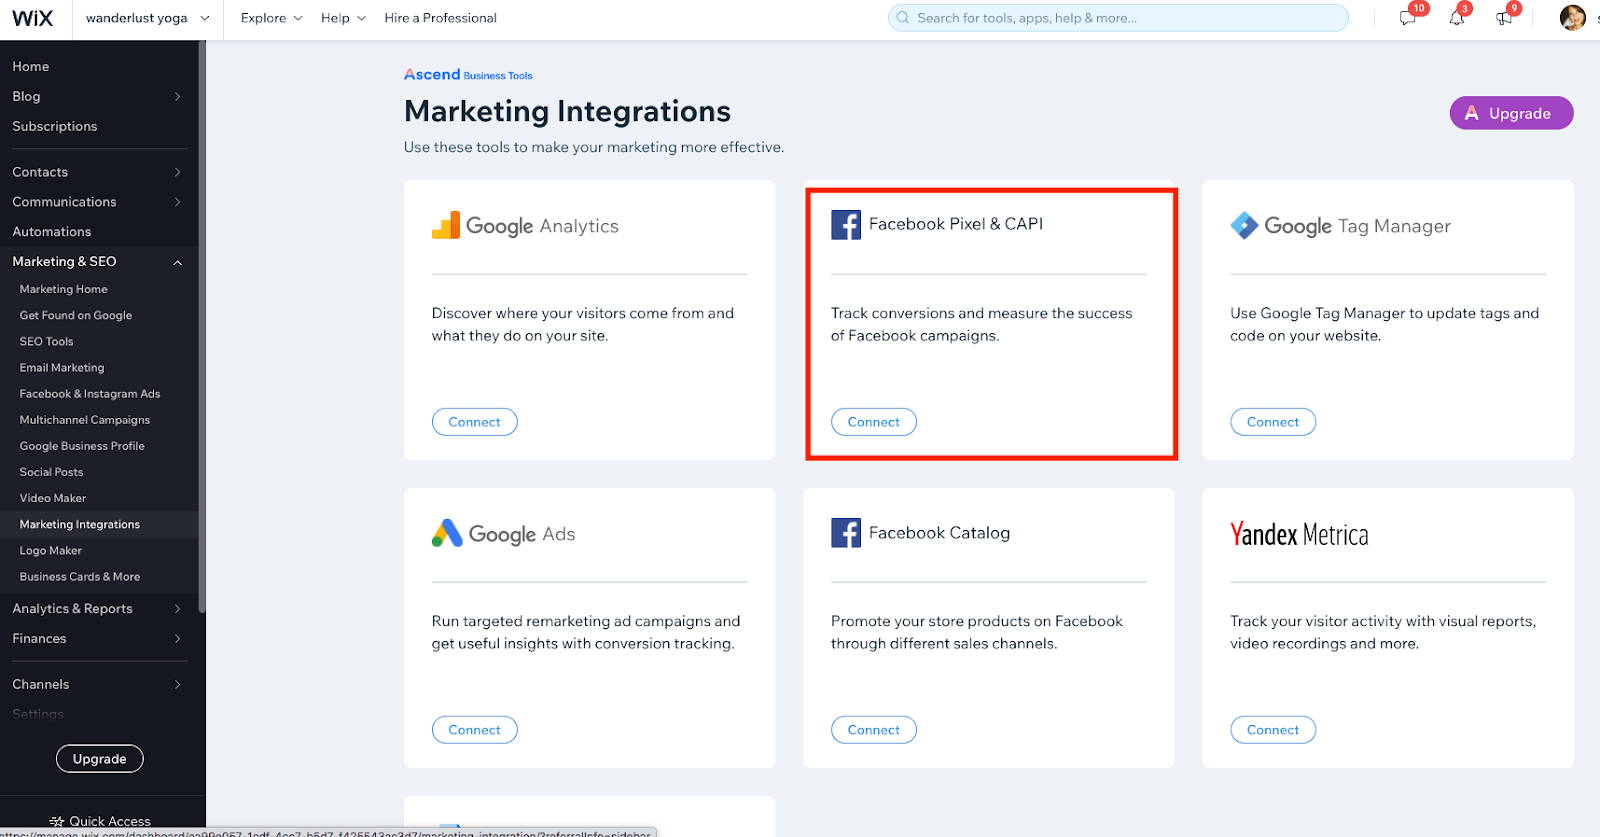
- Click on Marketing and SEO
- Click on Marketing Integrations
- Select the Facebook Pixel & CAPI option
- Click the Connect to Facebook option
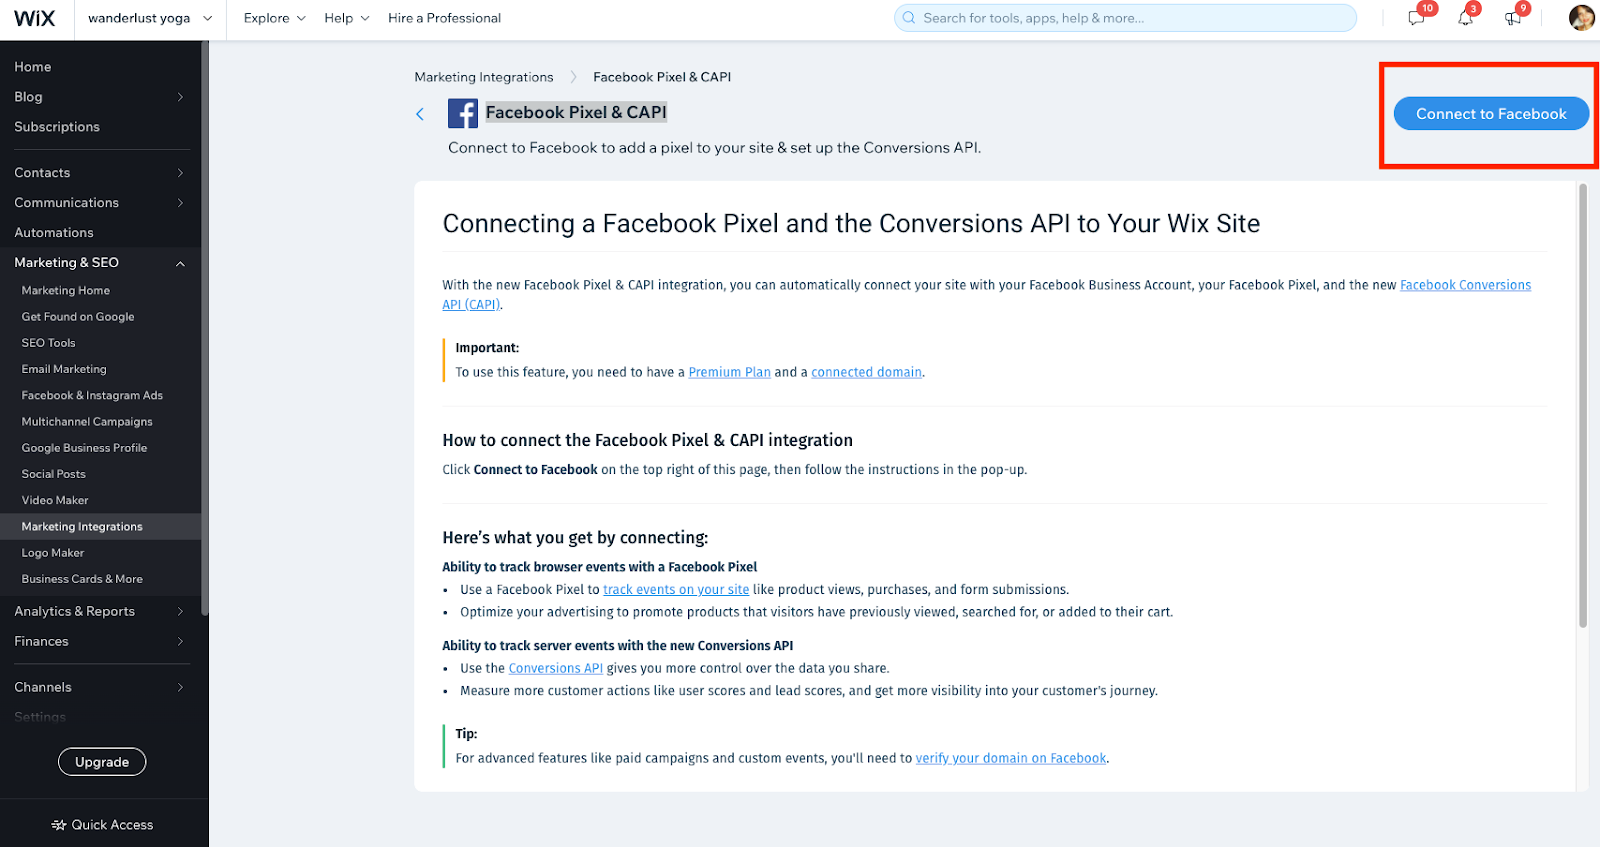
- Login to your Facebook page
- Choose the business page you want to create the pixel for
- If you're creating a new pixel, select Create New Pixel
- Name your pixel
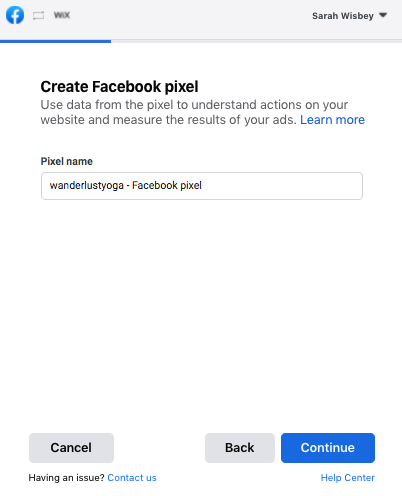
- Click Continue
- Your Pixel is created, yay!
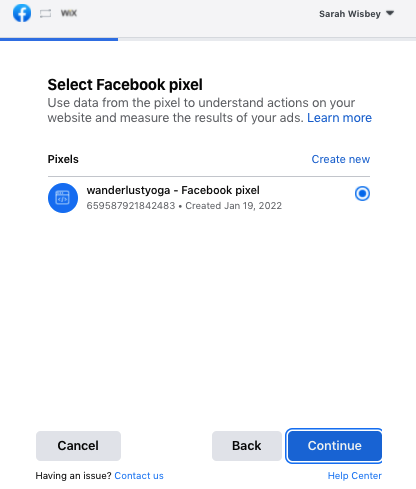
- Click continue (double-check that you created the pixel for the correct business manager)
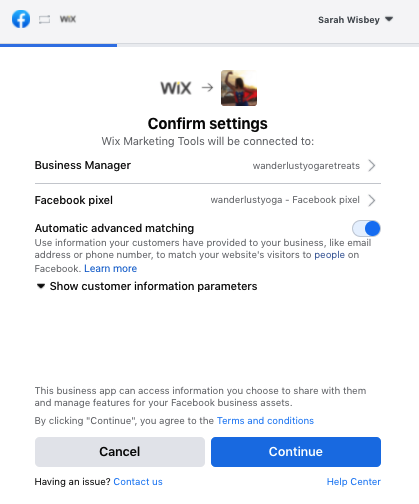
- If it's right, confirm the settings by clicking Continue
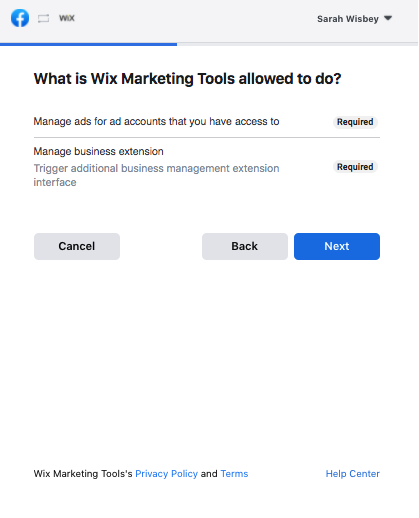
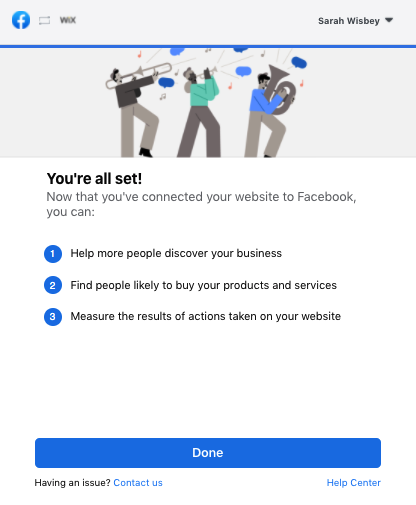
- Click Next on this screen:
- The process is complete! You should see this screen where you click Done
How to Test if the Pixel is working
- Download the Pixel Helper Extension for your browser
- Go to the website you created the Pixel for
- Click on the Pixel Helper Extension in the top right corner
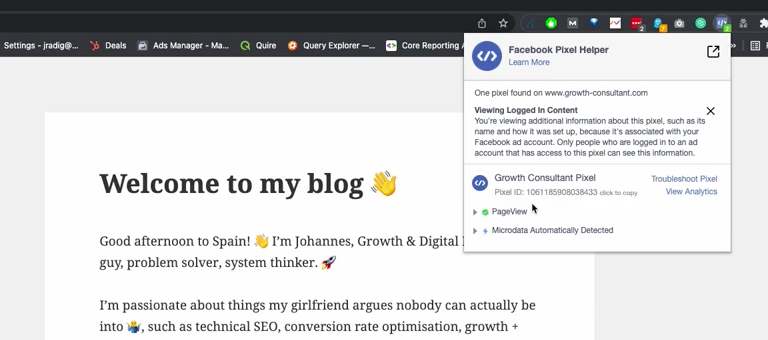
- Cross-check the Pixel Id matches the one you created
Setting up your Pixel - the Right Way
After you connect your Pixel with your website, you can continue setting up your Pixel back in Facebook Business Manager or Facebook Business Suite (whichever you started in)
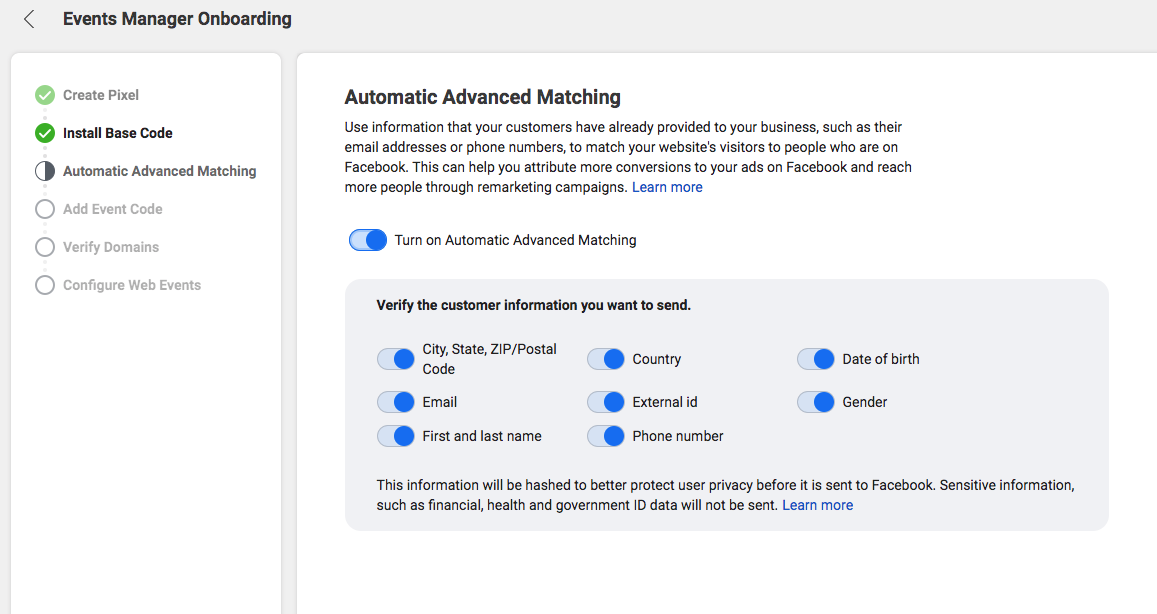
- For Facebook to get as much data as possible from your site, you need to activate the Automatic Advanced Matching setting like this:
- You will then have the option to Create Events, we'll leave that for now & come back to it later
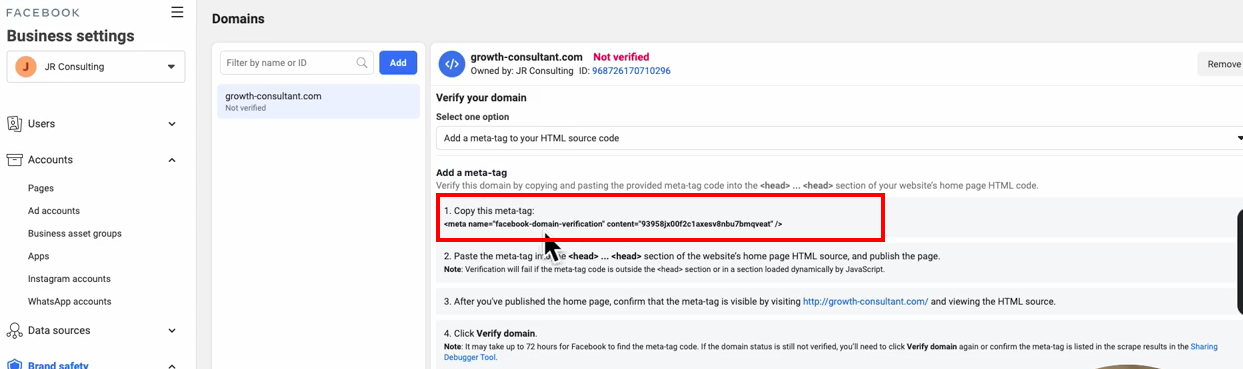
- You need to verify the domain & add it to your Business Manager
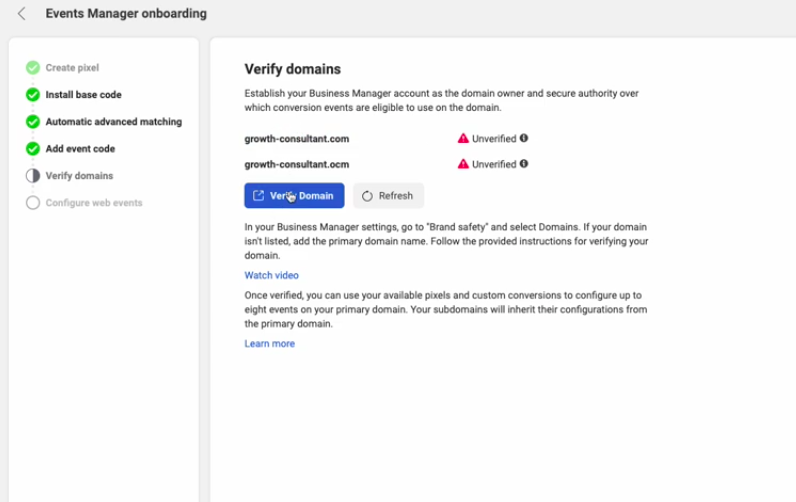
- Add your website domain and click Add
- You will get a few options - this is how to verify your domain by selecting Option 1 —> Copy this meta-tag copy the code you see in that section
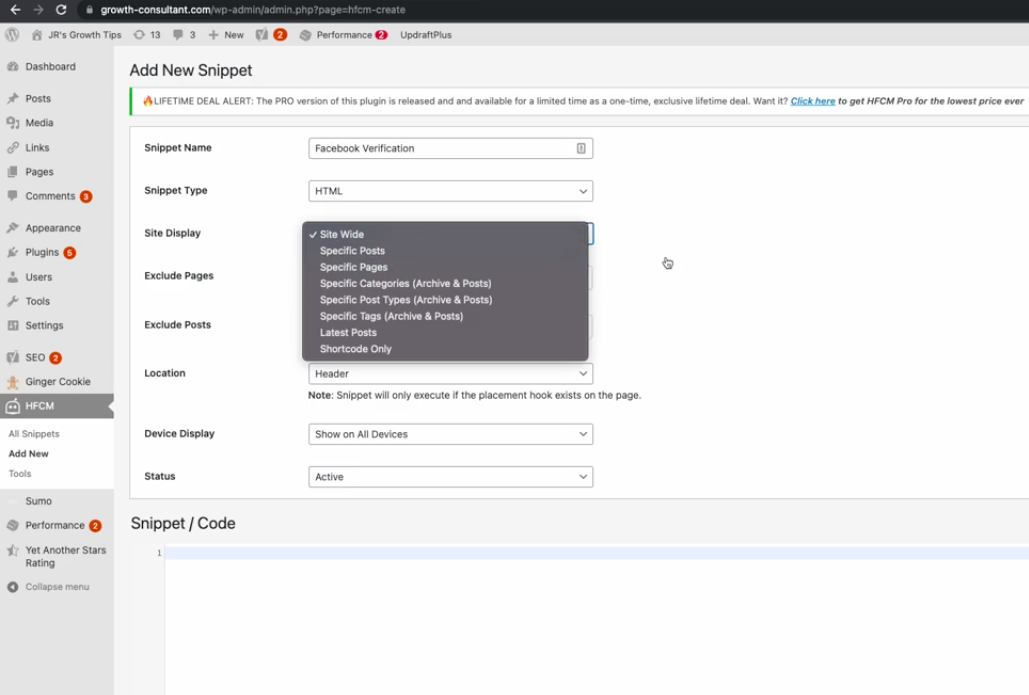
- Go to HFCM in WordPress and create a new snippet
- Add the code you just copied from Facebook to the Snippet / Code section at the bottom
- Go back to Facebook and click on Verify Domain. NOTE: it could take several hours until Facebook verifies it for you, so keep trying if you've done the steps above, it will work 😁
Creating Events and Custom Conversions
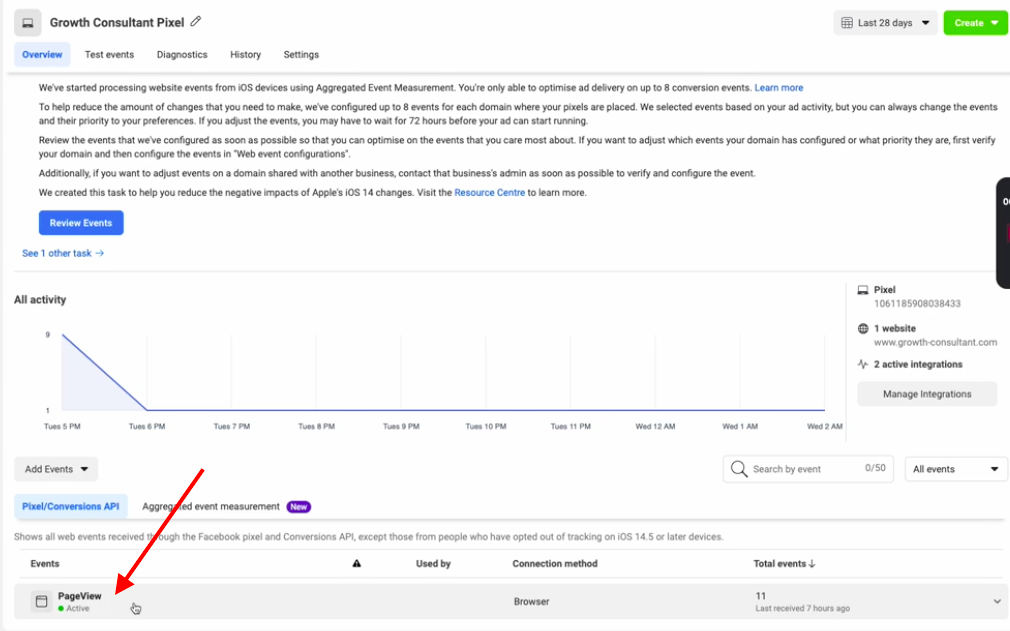
Now everything is set up you can test events and create custom conversions. The default event for your Pixel will be page views.
You'll see these at the bottom of your Event Manager —> Data Sources page:
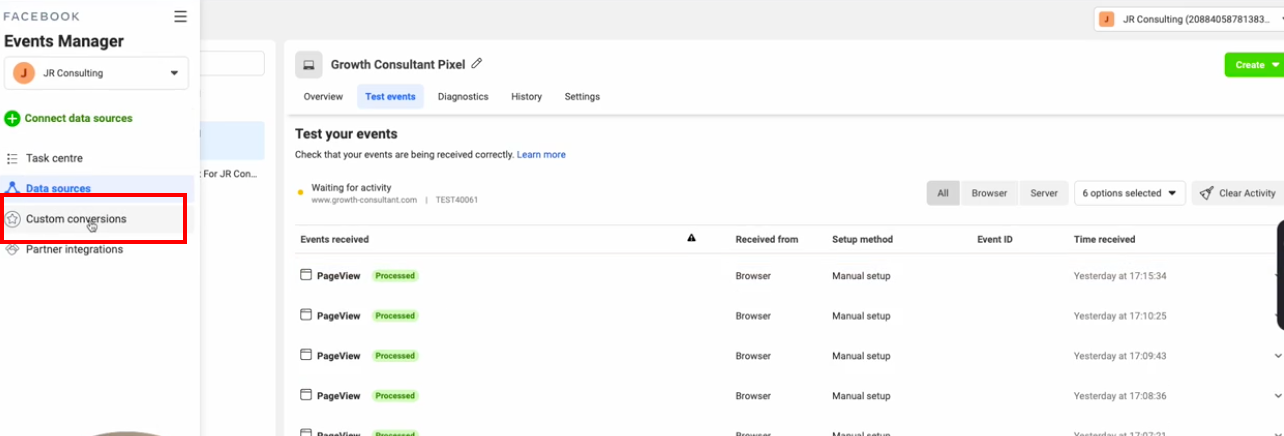
You can create different custom conversions depending on where people land on your website by doing the following:
- Click on Custom conversions on the left toolbar in your Facebook Events Manager
- You'll see a blue button that says Create conversion
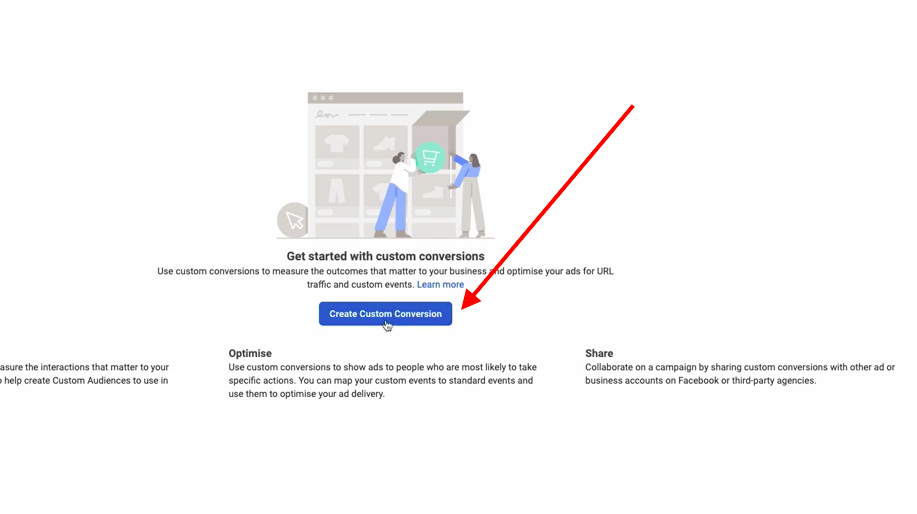
- Click and it will take you to this screen where you will select the pixel you just created:
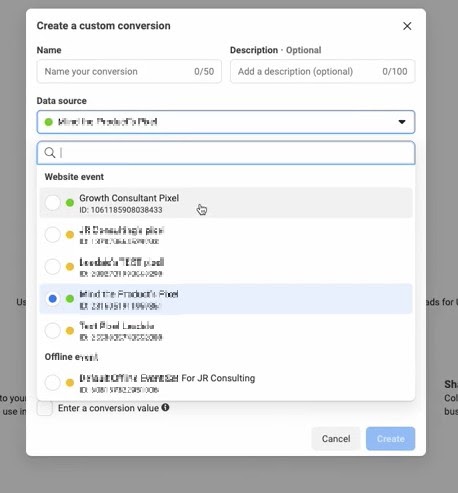
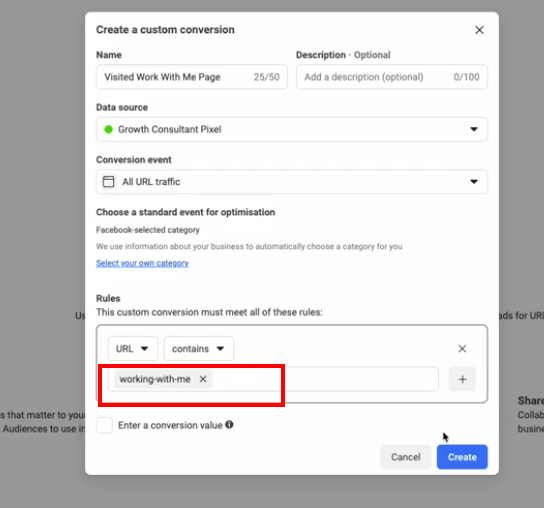
4. Name the conversion and then select the URL that you want to track
- Final step BEFORE you can create an ad —--> head back to Data sources and select Settings and select Share With an Ad Account
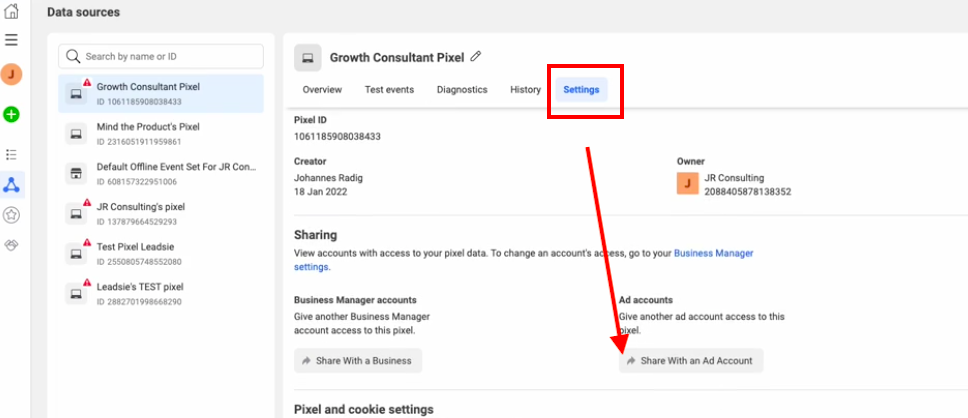
- Click on Add Assets
- Choose the Ad account you want to connect with the Pixel
- You can now use your Pixel in your ads
Here's how to Use the Custom Conversion from your Pixel in your Facebook Ads
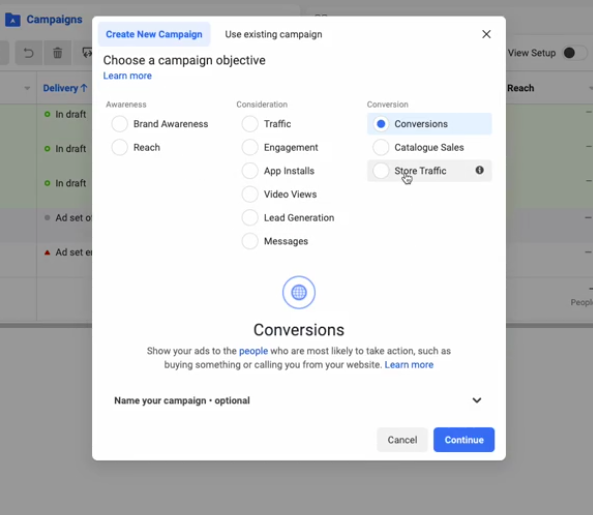
- Open Facebook Ads Manager
- Choose Create campaign
- Select a Conversions campaign (it's the most efficient way to spend your budget)
- At the ad sets level select the correct pixel
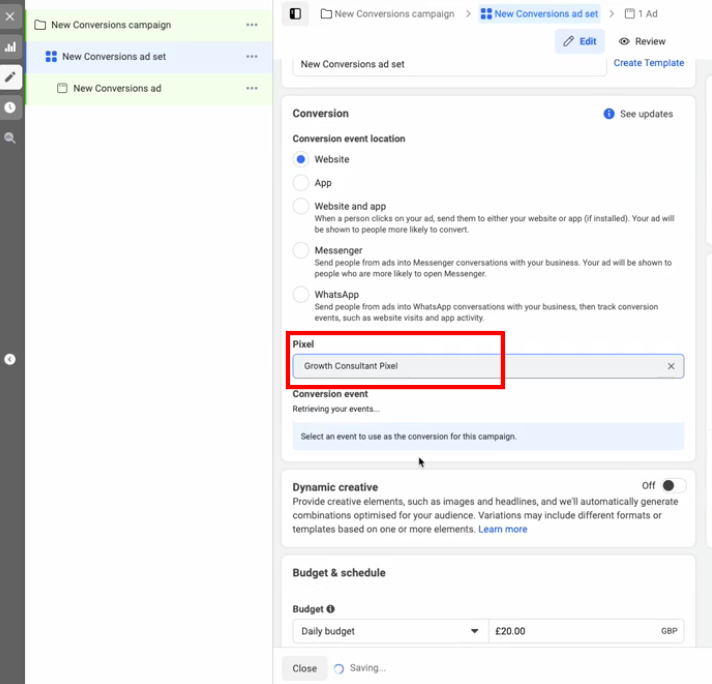
- You can also choose the custom conversion but you need at least one conversion to have occurred.
All good? Congrats for making it this far! Your pixel is up and running. 🕺
Bonus: Create Custom Audiences
You want data from your website to be sent back to Facebook so you can understand who is interacting with your site.
With this learned data, you can create custom audiences and it helps you to decide who to include or exclude in your campaigns.
Using your pixel correctly will save you money on ads as they won't be shown to people who are not likely to interact with them.
When you're running ads, give Facebook as much information as possible to know what is working and what isn't.
How to Give Access to your Agency or Partners
Looking to share access to your pixel with an agency or partner?
The easiest way is through Leadsie. With Leadsie, sharing access to your Pixel and other access takes just a few clicks, without the need to navigate through Facebook Business Manager. You can even do it from your mobile device:
If you'd like to grant access through Leadsie, just let your agency or partner know. They can create an account in 1min under leadsie.com and get an unlimited, free 14d trial. 🙌
Are you an agency or freelancer yourself? Just scroll below to sign up 🤘

ABOUT THE AUTHOR
Sarah Wisbey
Sarah gets most excited when writing about growth and learning by doing. She loves that her writing helps start-ups grow. When she's not caught up in the thrill of content writing, you'll find her surfing in the Atlantic ocean and running her own yoga retreats.
thomashaddespeame.blogspot.com
Source: https://www.leadsie.com/blog/how-to-create-set-up-facebook-pixel
0 Response to "How to Continue Pixel Set Up"
Post a Comment